


Remember
these fun holiday bulbs? Some of you may even still decorate with them! I decided to give them a fab makeover!

Unscrew the bulbs, and coat each one with some Elmers glue. Sprinkle glitter all over & tap to remove excess.
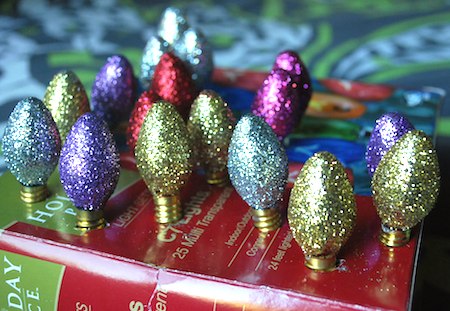
Set to dry & figure out how you will display these sparkling beauties!
On a wreath?
In a bowl?
Gift tags?
Ornaments?
On a wreath?
In a bowl?
Gift tags?
Ornaments?
So easy to make & I love the retro feel!


